
The North Texas Woodworker’s Association threw out a challenge for an upcoming meeting and I had to not only partake, but truly challenge myself with it. The challenge: Lamination.
The Encyclopedia Britannica defines it as “Laminated wood is usually built by the parallel gluing of lumber boards in a variety of sizes and shapes according to intended use. The main products are load-carrying members, such as beams and arches.” That’s nice. We just went with the even simpler version, “as long as it has two or more pieces of wood glued together, it counts.”
I had already attempted one laminated project for it, a little two-wood pot I called “Life”. I liked it, but it just didn’t call out as something that would really compete with some of the other members. Those guys are good!
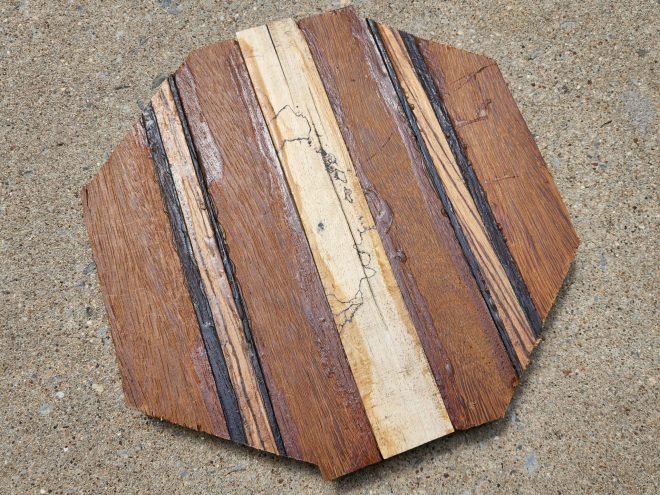
A trip to Rockler was just what was in order, as I was able to get some interesting little pieces from their off cuts box. Once I had determined the pattern I wanted, it was time to glue it all up.

Once it was dry it was just a simple matter of mounting it on the lathe and turning it, right?
I ended up going with a waste block for mounting given just how thin the wood was. It’s my first time doing this, but it definitely won’t be my last. It definitely made turning things easier without having to worry about if I went too thin.

Mounting was a snap thanks to the waste block. It even gave the unexpected benefit of putting the back a little farther away from the headstock, making it easier to access the back. I know I should have expected that benefit, but I was too worried about the glue not holding to think about other benefits.


I left the tail stock in place to support things for probably 85% of the work. Once I got started I had a feeling that the glue and waste block would continue to hold, but I still wasn’t willing to risk it. Call me crazy, but I like my face.
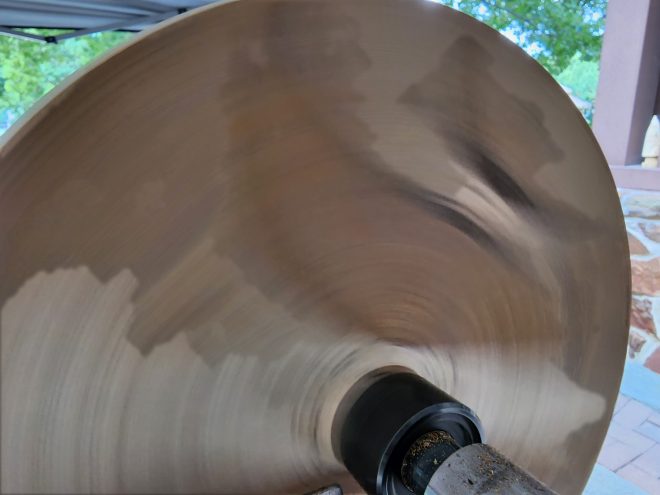
Once I had the shape I wanted and removed the tail stock to smooth out the center of the plate I sanded the piece from 120 to 1000 grit and then finished it with some tung wax from Brad’s Workbench out in East Texas. Used right (being patient) you can get a glass-like finish on the piece.
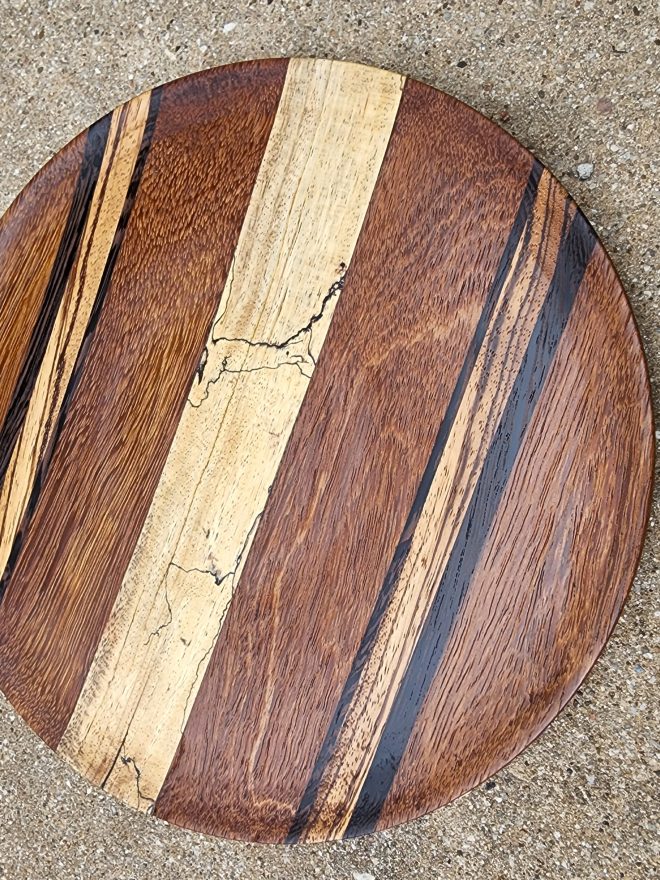
Ultimately, I couldn’t be happier with the final results!
More importantly, my wife was tickled pink to get it!